


Document Actions
gvSIG Mobile 0.3. User guide
The gvSIG Mobile Export extension for gvSIG Desktop is used to exchange data between gvSIG Desktop and gvSIG Mobile. It is useful for exporting layers to gvSIG Mobile that first need to be modified or clipped. This extension facilitates the transfer of mapping information between the two different platforms.
Installing the gvSIG Mobile Export Extension on gvSIG Desktop
The first step is to install the gvSIG Desktop extension that transfers data from gvSIG Desktop to gvSIG Mobile on the mobile device.
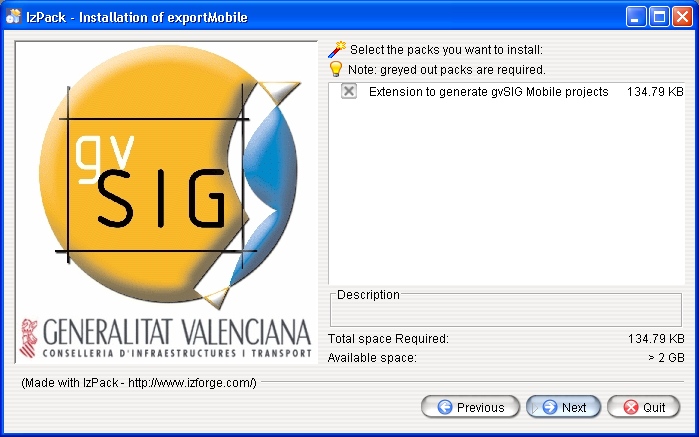
Installer for the data export extension
This extension can be used to export all layers of a project, whether local or remote, along with their symbology.
Configuring the export
The View menu of gvSIG contains the Export to gvSIG mobile... option which opens the window of the exporter. The export window can also be opened by clicking the relevant icon on the toolbar.
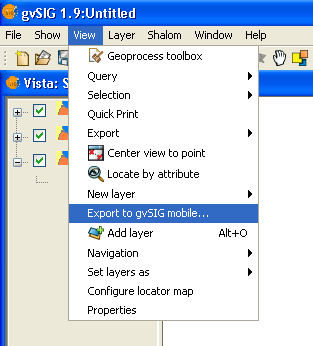
Starting the export process in gvSIG Desktop
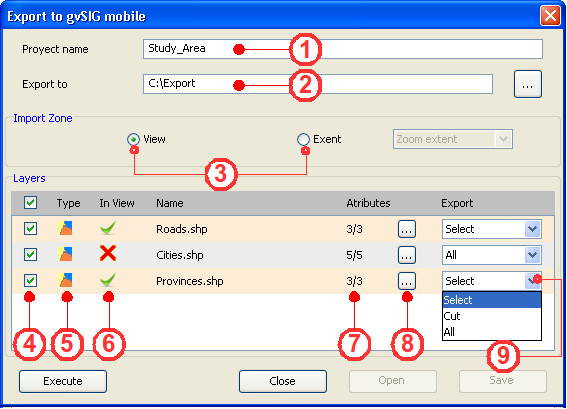
Setting the export parameters
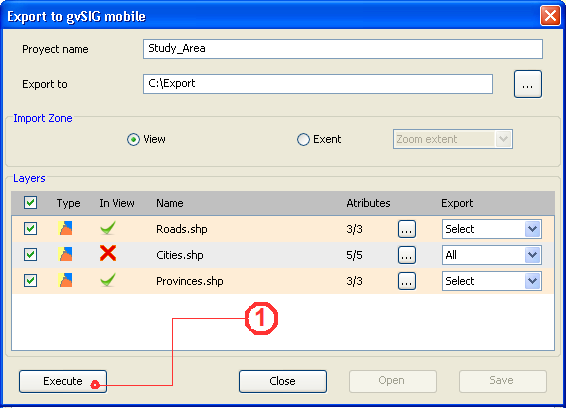
The exporter creates a new project that can be opened in gvSIG Mobile. In the exporter window indicate the name of the new project as well the destination folder in the text boxes Project name (1) and Export to (2).
The export area for the layers can be specified as the current View (3) (this is the default option) or a saved Extent (select a saved zoom extent from the drop-down list).
Once the export area has been specified, the export layers and attributes are chosen. In the Layers section indicate which layers are to be exported by selecting the appropriate check boxes (4). The Layers sections also indicates the layer type (5), whether the layer is visible within the view (6), the layer name, the number of fields in the attribute table of each layer to export (7), and the selection process (9).
With respect to the attributes, the user can specify which attribute fields to export for each layer. Click the button next to the total number of attributes (8) and select the fields to be exported to gvSIG Mobile.
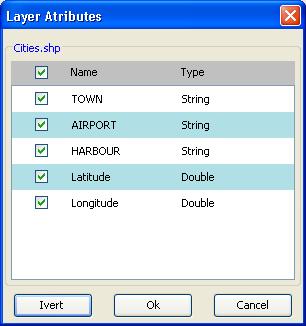
Choosing which attributes to export
Finally, select the export method for each vector layer (for raster layers the entire raster is exported, provided they intersect with the region shown in the view).
- Selection. This option exports only those layer geometries that intersect the view. Any geometries that don't intersect the view (i.e. aren't visible) won't be exported.
- Cut. (CLIP) This option clips all layer geometries to the extent of the view and exports the clipped geometries.
- All. This option exports the entire layer.
Exporting the data
After configuring the export options for the different layers the export process is started by clicking the Execute button (1). The exporter creates a new folder in the indicated path and then saves the selected layers and gvSIG Mobile project (gvm) into this folder. This project can be opened with gvSIG Mobile.
Perform the export
NOTE:
In gvSIG version 1.1:
- There is a bug in the CLIP function that produces a fault with some data sources. In this case it is recommended that the select option is used instead of clip. This error occurs when a SHP.QIX files is present alongside the SHP file (the problem disappears if it is removed).
- The CLIP process fails when some of the attributes have NULL values (this is often an indication that the SHP/DBF files are corrupted).


